Building user-friendly applications often requires providing feedback or notifications to the user. Within the realm of Python GUI development, PyQt’s QMessageBox stands out as a reliable tool for such interactions. This tutorial focuses on showcasing how to implement a message box with PyQt5 and details the various customization options available.
Displaying a Message Box in PyQt5
The primary widget we’ll be discussing is the QMessageBox from PyQt5. This widget provides a dialog to present an informational message to the user, which can be supplemented with interactive buttons. Whether you’re transitioning from PyQt4 or just starting with PyQt5, the implementation remains consistent.
Before diving into the specifics, ensure you have the PyQt GUI module installed.
To begin, import the QMessageBox widget from PyQt5:
from PyQt5.QtWidgets import QMessageBox |
Introducing a messagebox into your application can be as straightforward as the following code snippet:
QMessageBox.about(self, "Title", "Message") |
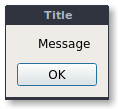
The below example illustrates a scenario where a window houses a button. When this button is clicked, our previously discussed messagebox gets triggered, complete with a set title and message:
import sys |
Customizing the Appearance of QMessageBox
The flexibility of PyQt5 allows developers to modify the icon displayed in the messagebox. The available icons are: information, question, warning, and critical. Tailoring the icon to the context of your message can enhance user comprehension.
Altering the icon is straightforward:
msg.setIcon(QMessageBox.Information) |
Integrating Interactive Buttons into QMessageBox
Beyond just displaying a message, you may want to give the users choices on how to proceed. PyQt5 permits the addition of multiple buttons to your messagebox, and you can define these using the setStandardButtons() method.
Here’s how you can integrate common buttons like ‘Ok’ and ‘Cancel’:
msg.setStandardButtons(QMessageBox.Ok | QMessageBox.Cancel) |
PyQt5 provides a suite of predefined buttons, including but not limited to:
- QMessageBox.Ok
- QMessageBox.Open
- QMessageBox.Save
- QMessageBox.Cancel
- QMessageBox.Close
- QMessageBox.Yes
- QMessageBox.No
- QMessageBox.Abort
- QMessageBox.Retry
- QMessageBox.Ignore
To determine which button the user clicked, you can capture its return value. For instance:
userResponse = QMessageBox.question(self, 'User Choice Prompt', "Please select an option", QMessageBox.Yes | QMessageBox.No | QMessageBox.Cancel, QMessageBox.Cancel) |
Mastering the integration and customization of PyQt’s QMessageBox can greatly enhance the user experience of your application. With the provided examples and information, you should now be equipped to implement engaging and informative message boxes.